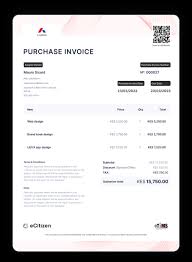
Kenya’s transition to the Electronic Tax Invoice Management System (eTIMS) marks a transformative step in streamlining tax compliance for businesses. Launched by the Kenya Revenue Authority (KRA), eTIMS is designed to simplify invoice generation, enhance transparency, and ensure real-time reporting to KRA. Whether you’re a small business owner, a freelancer, or a large corporation, learning how to generate an eTIMS invoice is essential for staying compliant in Kenya’s tax landscape.
This guide will take you through the step-by-step process of generating an eTIMS invoice
In this article
What is eTIMS?
The Electronic Tax Invoice Management System is a digital platform introduced by KRA to facilitate the issuance, validation, and reporting of tax invoices in compliance with VAT laws. It supports businesses by automating key processes, thereby reducing manual errors, fraud, and inefficiencies.
Benefits of eTIMS
- Compliance Made Simple: Automatic real-time transmission of invoice data to KRA ensures adherence to VAT regulations.
- Transparency and Trust: Auditable systems increase trust between businesses, customers, and regulatory bodies.
- Cost-Effective Operations: eTIMS eliminates the need for extensive manual intervention, reducing operational costs.
- Accessibility: A variety of platforms, including eTIMS Lite and hardware-based solutions, cater to businesses of all sizes.
Step-by-Step Guide to Generating an eTIMS Invoice
Step 1: Registration and Onboarding
Before you can start using eTIMS, ensure you are registered on the KRA iTax Portal.
- Log In to iTax: Use your PIN and password to access your account.
- Confirm VAT Registration: Ensure your VAT status is updated.
- Enroll in eTIMS: Choose the appropriate eTIMS platform eTIMS Lite, POS, or ERP-based solutions based on your business needs.
Step 2: Access the eTIMS System
Once onboarded, access the eTIMS platform:
- Log in to eTIMS Lite using your credentials.
- Select the Generate Invoice option.
Note: eTIMS Lite is ideal for SMEs and can be used on smartphones, tablets, and computers, ensuring flexibility for businesses of all sizes.
Step 3: Input Customer and Transaction Details
To create an invoice:
- Enter the customer’s name and PIN (if available).
- Provide the invoice date, invoice number, and description of goods or services.
- Input the quantity, and unit price, and calculate VAT (16%).
- Add any additional details, such as discounts or shipping charges.
Step 4: Generate and Validate the Invoice
- Click Generate Invoice to process the transaction.
- The system automatically assigns a QR code for authenticity verification.
Tip: The QR code is crucial for confirming that the invoice is compliant with KRA regulations.
Step 5: Print or Share the Invoice
- Use an eTIMS-compliant printer to print the invoice.
- Alternatively, save the invoice as a PDF and email it to the customer
Step 6: Automatic Reporting to KRA
eTIMS ensures that all invoices are reported to KRA in real-time, eliminating the need for manual submissions.


